How to record audio with OneNote to supercharge your note-taking

We’re big fans of OneNote around here, but there’s one killer feature that often gets overlooked in coverage of the note-taking program: recorded audio. The ability to record audio (or video, hardware permitting) sounds pedestrian. Your PC, smartphone, or tablet could easily do that with any number of apps.
But recording audio with OneNote on Windows has a special advantage. Not only is the audio recorded, but the program tracks your concurrent note-taking with time stamps during the recording process. This means you can jump to a specific point in a lecture or meeting recording just by selecting a certain paragraph in your notes.
It’s a fantastic way to go over your notes point-by-point to make adjustments, add more information, and so on.
This tutorial uses OneNote 2016 on Windows 10—a free download from Microsoft. The Windows Store version of OneNote does not have the audio-recording feature.
OneNote recordings

Create a new page in the notebook of your choice. Then when it comes time to make an audio recording, go to OneNote’s main menu and selectInsert > Record Audio.
As soon as you press that button another menu tab will appear calledPlayback along with an option called Audio & Video Settings.
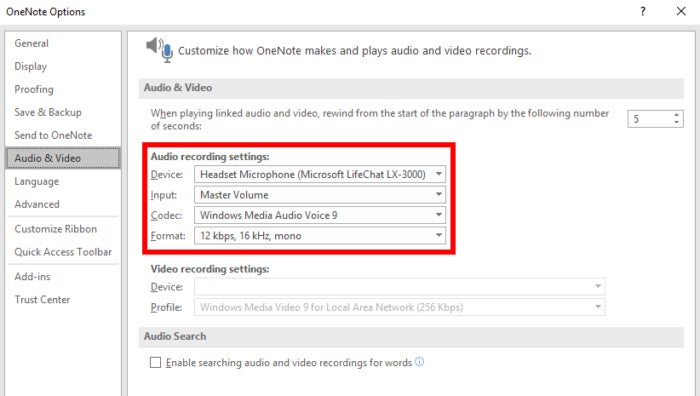
Click that menu option and a pop-up window opens allowing you to adjust various settings such as the recording device (headset, built-in mic, etc.) and audio codec. Under Audio Search you can also enable a feature that lets you search audio and video recordings using text. If you enable that feature, OneNote will inform you that audio quality will need to be high, that the audio indexing takes several hours during which OneNote must remain open, and that the recorded language must match your interface language.
Back to the codecs for a second, in my tests none of the codecs worked on my Android device even though the audio file will appear to be available for playback on mobile. OneNote saves all its audio files as WMA.
Recording
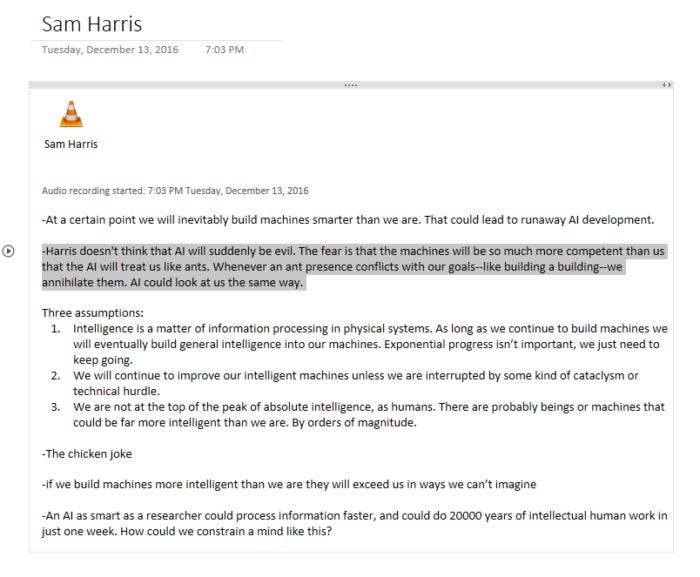
The recording will show up inside your OneNote page as an icon for whatever your default player is for WMA files—VLC in my case. The recording will also automatically use the page name for its title.
Now just take notes on the same OneNote page as the recording. OneNote creates a new time stamp for each paragraph in your notes. To keep important points separate make sure you hit Enter to start a new paragraph.
When you’re finished recording click the Stop button under the Playback tab. As usual, OneNote will start syncing your notes (including the audio) to the cloud.
Jumping around
To listen to a specific point in your recording based on your notes, hover over the related paragraph or sentence. A small play button will appear to the left of that section. Click the play button and the recorded audio starts. By default, the recording jumps back 5 seconds from the original time stamp you wanted to hear. You can adjust this option under Playback > Audio & Video Settings.
As the recording plays, OneNote will automatically highlight the section of notes that corresponds to each time stamp. The recording will continue playing until you hit the pause or stop button.
You really can’t beat OneNote’s ability to link notes and recorded audio. It’s a must-use for anyone who has to take lengthy notes in meetings or lectures.


Post a Comment